What I like about my prompt
I have a little bit of an addiction to pimping out my development environment and nothing allows me to feed that addiction more than my terminal. The brilliant minds that are part of the open source community are constantly creating great new solutions and refining old ones. It's a place that offers endless possibilities for modification.
If you are just starting out, it can be a bit daunting so I thought I would throw together a short crash course that will have you working in style in no time.
First things first, I develop mainly for the web and work on a Mac so this will be mostly relevant for that environment. If you don't have a Mac, and you can afford one, stop what you are doing and go buy one. Everything else in this article is just an opinion, web development on a Mac is not. Seriously, I cannot believe I spent 12 of my 19 years as web developer on Windows.
Ok, enough of that. What we will be doing is installing a better terminal emulator, a new shell and a few other things that will make your terminal experience more enjoyable, and most importantly, more efficient.
The Terminal Emulator
iTerm is a powerful replacement to the default Terminal app that come on OS X. Apple has stepped up and improved Terminal in the last few versions of OSX but I still prefer iTerm.
Some advantages of iTerm are:
- 1. Quick window splitting without having to learn tmux commands by using intuitive shortcuts like
and . - 2. Arrangements. You can configure iTerm to open by default into a predefined a location on your desktop, with multiple windows and unique profiles per window.
- 3. Search term highlighting
- 4. Growl support for notification of completed processes.
- 5. Highly configurable. iTerm2 has a rich preferences section so you can get it just the way you want it.
Go ahead and download iTerm2 here: iTerm2
Also, install the shell integration features here: iTerm2 Shell Integration
zsh shell and oh-my-zsh
- More control over command prompt.
Syntax highlighting of $man pages, $sh commands, etc. And if your into ~vi, vim, nano~, they call all have language specific coloring.
Beyond tab completion, zsh has command suggestion. So you type $sudo taol -n 100 /var/log/mysql/error.log and it asks, "Did you mean $tail?". Hit "Y" and the command runs w/o having to retype it. AND this works for all installed packages. So install node.js, fat finger a $node lirst command, and it corrects it.
Plugins!!! You have to install Oh My Zsh to make zsh really stand out over bash. take look at all the prebuilt plugins you can add to it. Good stuff there: https://github.com/robbyrussell/oh-my-zsh/tree/master/plugins
Some simple examples are $jump that you can use to book mark directories and say $jump utilities and it takes you to /Applications/Utilities. Or more advanced plugins that contain powerful Git scripts. Ruby, Python, Heroku, Django, it all there.
A plugin for AWS was committed with positive feedback to expect it to be in the next release but there are several on GitHub you can add manually now. ex. grebburek / awe-scripts
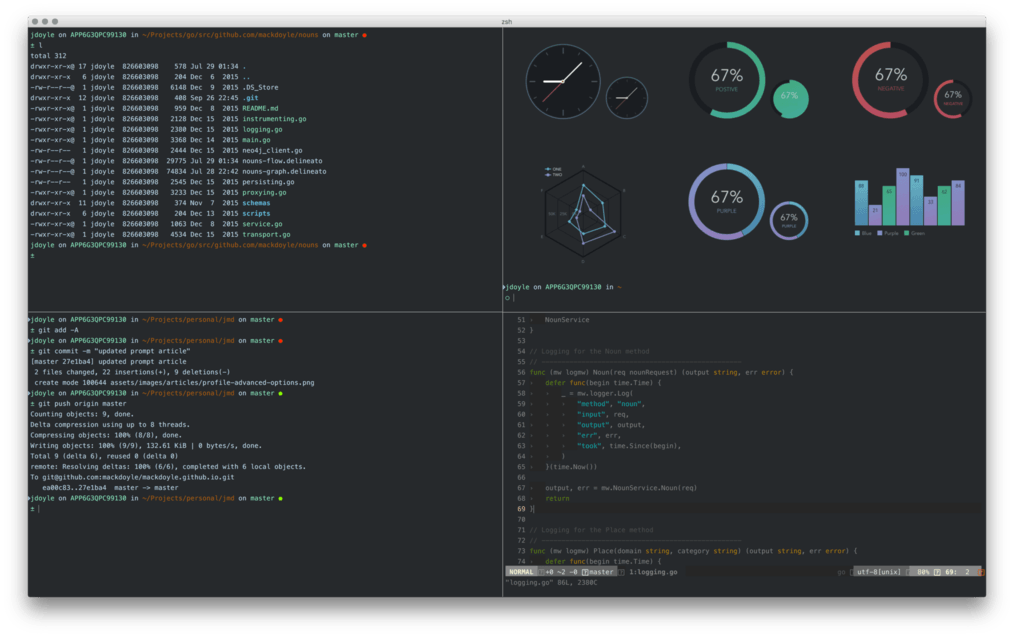
User profiles in iTerm. With iTerm you can create multiple profiles define how they open when you launch your prompt. For example, I have one that loads into a web project and shows some Git stats, and another that loads in a subdued color scheme and fires off a $tail on some error logs.
Install zsh
Install with Homebrew- $brew install zsh
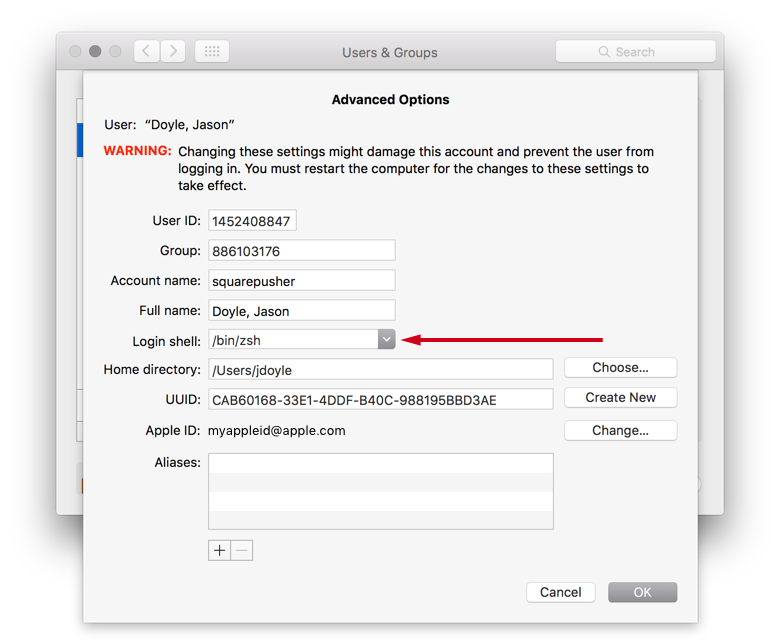
- Go to System Preferences>Users and Group. Click on the padlock to unlock it and then ctrl-click on your profile icon to open the Advance Options.
- In the Advanced Options for you profile, set your Login Shell to:
/bin/zsh - If you hate it, set it back to:
exec bash
Install Manually
- CD to your user directory
- Get autoconf if you don't have it: $git clone git://git.sv.gnu.org/autoconf
- Get zsh: $git clone git://git.code.sf.net/p/zsh/code zsh
- Run
$~/zsh/Ultil/preconfig - Go to System Preferences>Users and Group. Click on the padlock to unlock it and then ctrl-click on your profile icon to open the Advance Options.
- In the Advanced Options for you profile, set your Login Shell to:
/bin/zsh - If you hate it, set it back to:
exec bash
SPF-13
If you use Vim, SPF-13 is the best set plug-ins and configuration scrits I have come across.
Get more info here: http://vim.spf13.com/
You now have all the basics. Start with customizing Oh-My-Zsh and you are on your way to having a pimped out dev environment.